Ford advises 6.7 Powerstroke owners to change their fuel filters after every 15,000 miles of travel, during the third oil change, or as suggested by the message on the instrument cluster. Owners can act on these depending on which one comes first. Other online sources suggest changing it after every 20,000 – 40,000 miles of travel.
Changing your fuel filter on 6.7 Powerstroke helps to remove impurities, debris, and particles that may prevent your engine from performing at its peak. It may force the engine pump to work harder if it’s clogged. This then leads to breakdown and damage to the engine due to contaminated fuel.
A damaged engine is characterized by bad gas, sluggish acceleration, difficulty in starting, decreased fuel economy, and frequent stalls. Ford also advises 6.7 Powerstroke owners to go for those built by Motorcraft. These are specifically designed to meet the demands and needs of the Powerstroke engine.
They are of the right size and quality and provide better filtration without requiring an adaptor. However, a fuel filter from any other reputable brand should also do the trick. Below is a step-by-step process that will show you how to change yours on the 6.7 Power stroke.
Table of Contents
What you will need to follow this tutorial?
- Gloves.
- 32 mm socket wrench.
- New OEM fuel filter.
Step by step instructions
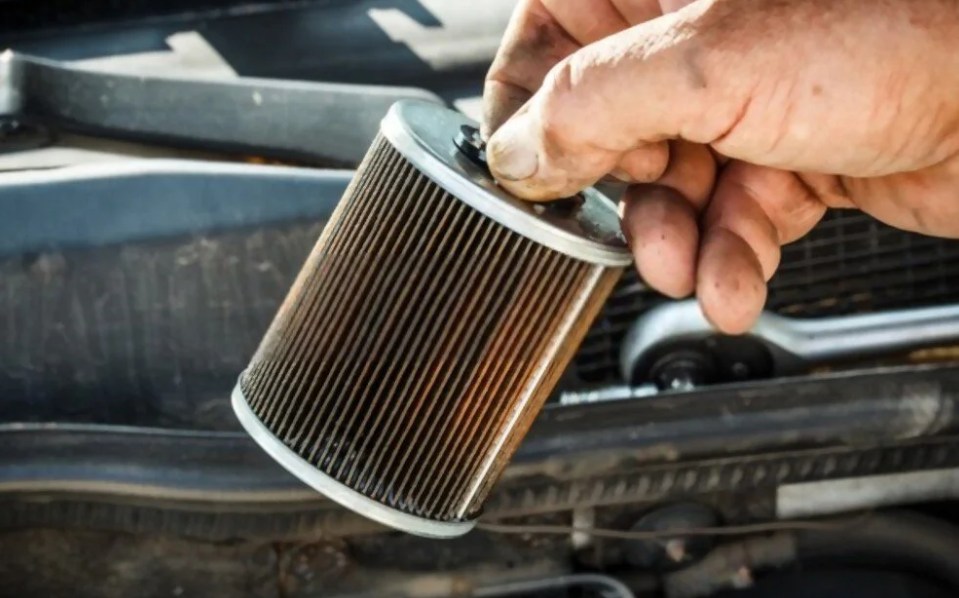
The Ford 6.7 Powerstroke is equipped with two sealed cartridge fuel filters. The main one is found at the bottom of the car, almost in the middle of the chassis along the driver’s frame rail. The second is found on top of the engine.
Main Filter
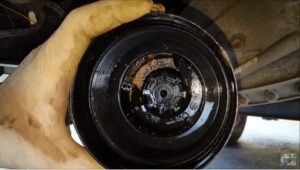
🚗 1. Locate the main filter
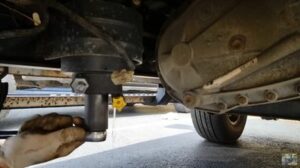
As mentioned, the main filter is located at the bottom of the truck. You can find it along the driver’s frame rail. You may experience some obstruction from wire harnesses and brake lines depending on the model year.
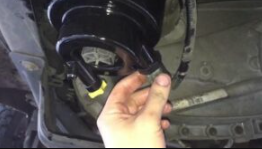
🚗 2. Drain all the fluid
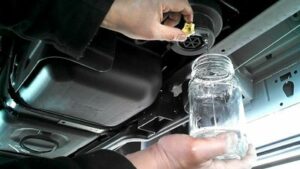
Once you locate the main filter along the driver frame rail, start by disconnecting the fluid sensor to prevent it from getting damaged by water and fuel. Place an empty jar below the valve and open it to drain the fluid. You can proceed with the next step as the fluid flows out.
🚗 3. Remove the plastic housing
Use the 32 mm socket wrench to remove the filter housing. It will take an average of 5 to 6 turns for it to completely come off.
The housing may come off together with the old filter. If it doesn’t, pull it out.
🚗 4. Clean the housing
Your filter housing may have mud, debris, or sand in it. Wipe everything off with a clean cloth. Remember also to clean the grooves which the housing screws into.
🚗 5. Replace the old O-ring
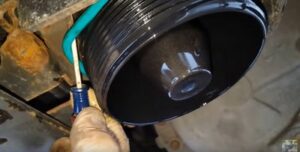
Every new fuel filter comes with a new O-ring. Replace the old with the new. Make sure it fits perfectly on the top-most groove.
🚗 6. Install the new fuel filter
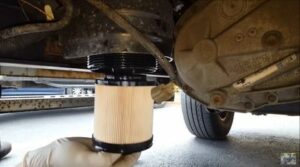
Insert the new fuel filter together with the clean housing. Turn the whole unit by hand until you feel it tighten. Avoid screwing it in place using a wrench as you might break it. Remember to reconnect the fuel and water sensor after completing your installation.
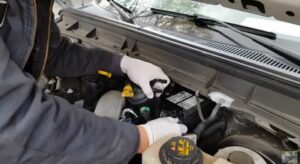
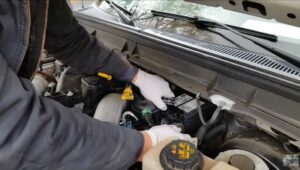
Secondary Fuel Filter
🚗 1. Disconnect the fuel lines
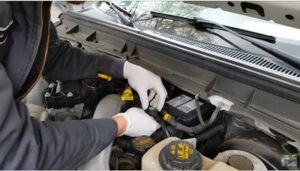
Once you locate the secondary fuel filter on top of the engine, you’ll need to disconnect the two fuel lines found above it. The first line requires you to squeeze the two tabs at the bottom of the colored clamp and pull it upwards.
You can place a rag under the clamp to catch the drops of fuel draining from the line. The second line requires you to squeeze two tabs found on either side of the clamp before pulling the line out.
🚗 2. Remove the old filter
Once the fuel lines are disconnected, turn the plastic housing counterclockwise to remove it.
🚗 3. Install the new filter
Replace the old filter with the new one. Both will be contained within their respective housings, and you will not need to open them up. Once done, lock the new filter in place and push your fuel lines back on.
🚗 4. Cycle the key 6 times

The next step is to place the key into the ignition. Switch on the truck 6 times at 30-second intervals. This helps to rid the engine of any unwanted air. Skipping this step increases the risk of getting air in the high-pressure fuel parts.
🚗 5. Check your settings

For models not older than 2011, you’ll need to scroll through your settings to confirm the new change.
Scroll down to Settings > Vehicle > Maintenance > Fuel Filter > Hold OK if Fuel Filter Changed. You should see a notification that says “Fuel Filter Set to New.”
Conclusion
Particulates from several sources can penetrate into the gas tank through breathers and vents. Such contaminants and other abrasive particles can quickly damage an engine. The fuel filter’s most important role is to rid the engine of these particles. Its other role includes acting as a water separator.
When water mixes with diesel, it causes a reduction in power and the quality of fuel burn. It also makes engine components such as pumps and injectors to corrode. Wear and tear of fuel injectors are one of the major causes of early injector replacements.
This makes it extremely important to change your fuel filter after every 15,000 – 25,000 miles. This post provides a detailed process of changing both the main and secondary filters in a 6.7 Powerstroke. Let me know in the comment section if this was helpful. Do share if you liked it!